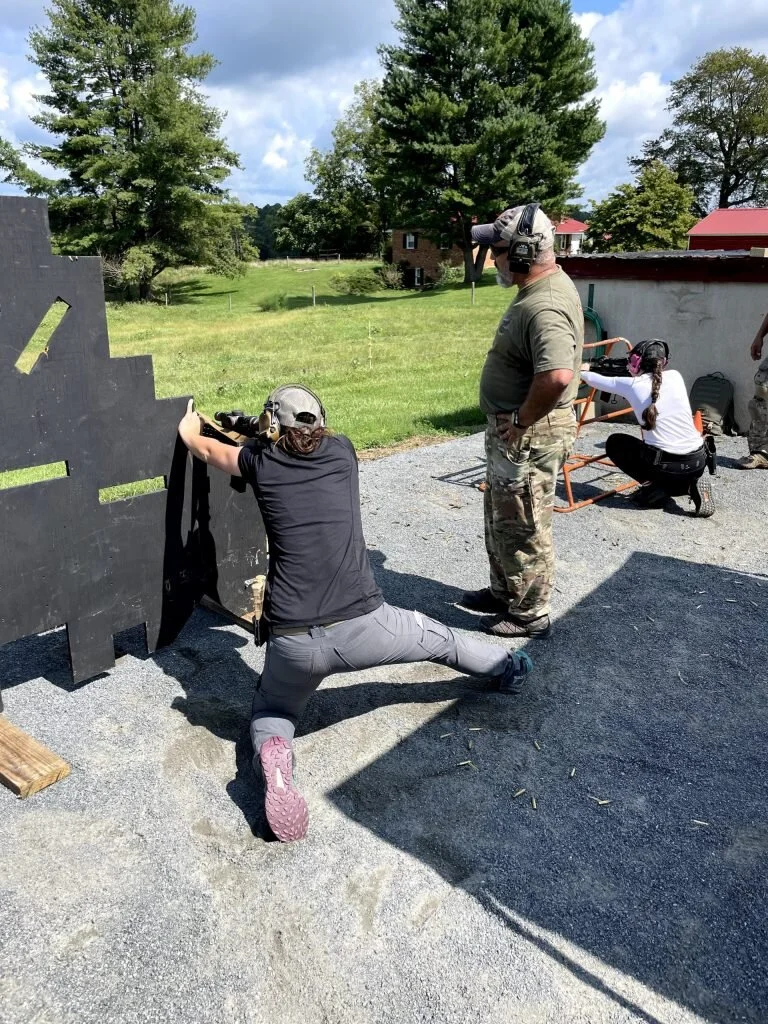
The History of the VTAC Barricade
The Viking Tactics Barricade designed by Kyle Lamb and 9 hole drill is meant to call your shots and build effective positions on ports that work for you and your weapon system. This was apparent after a recent LPVO class taught by Green Ops and trying my own hand on the barricade. Kyle designed those awkward positions to enhance your awareness of what works and what doesn't.
Article originally posted at Gatdaily.com
“The barricade wasn’t made to force you to learn how to shoot to a high standard through each port, it was made to show you why one position may be better based on your abilities and equipment being used.” Jose Gordon- Retired Ranger and now instructor for Green Ops
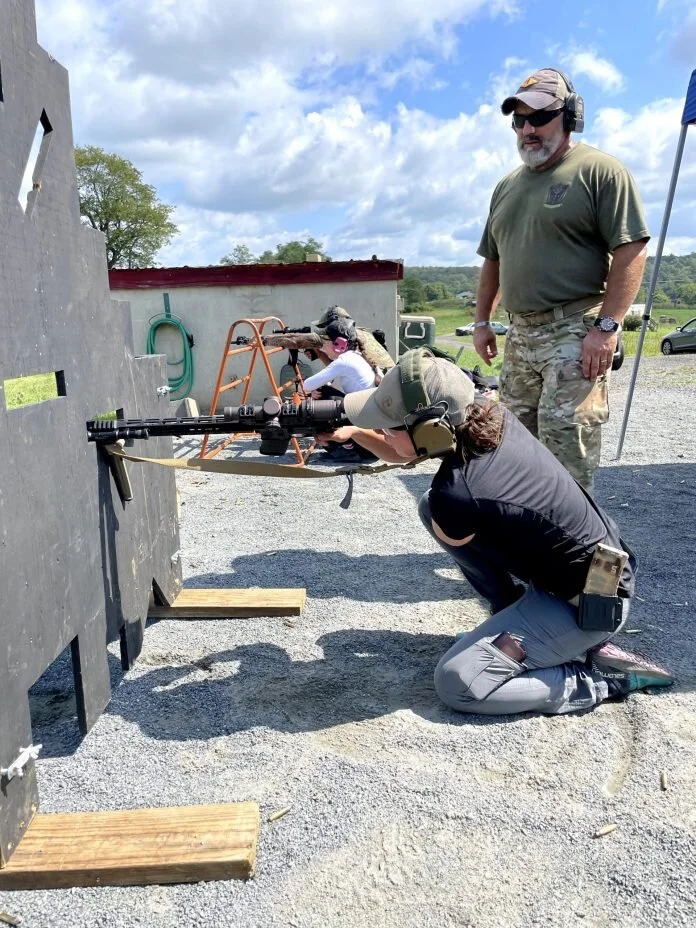
This past weekend I took a Low Powered Variable Optics Class taught by Green Ops in Culpeper, VA.
After hearing that last statement and switching my train of thought from “I wish I shot better in this position”, to “I now know how to use that position, however I can see more and get shots off much faster in that other position.” It changed my appreciation for the barricade and knowing my weapon system.
From the Designer of the Barricade, Kyle Lamb of Viking Tactics
“What are we trying to accomplish? First and foremost, we want to find the positions that work for you. I want students to experiment with different positions to see what works. You can also change the difficulty of the drill by adding support side shooting on the last low hole or shoot the entire drill from the support side.”-Kyle Lamb (Viking Tactics, Guns and Ammo Article)
Note: For the purpose of this article I will be referring to the use of this barricade with a rifle, however it can be used in both rifle and pistol application.
https://surefire.news/training-kyle-lamb-discusses-vtac-9-hole-night-drill/
The Viking Tactics Barricade designed by Kyle Lamb
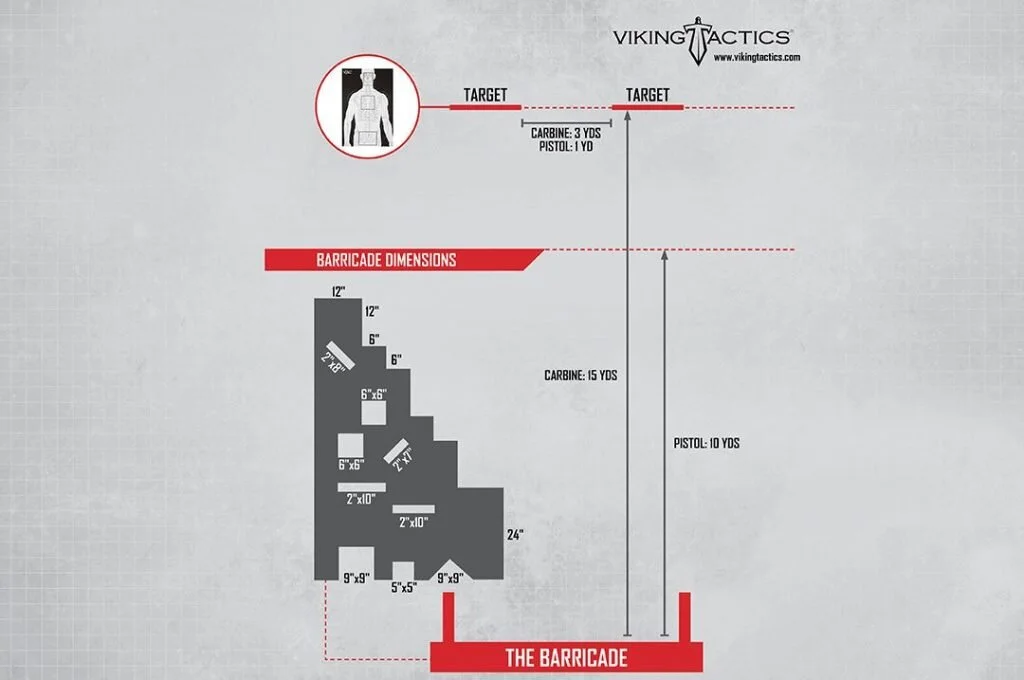
The 9 hole barricade that we see so often on ranges, in military training courses, and being used for shooting tutorials, is known as the VTAC Barricade, invented by Kyle Lamb of Viking Tactics (VTAC). It is a piece of wood with 9 different sized and angled ports while also being shaped with your standard 90 degree ledges.
Kyle Lamb invented this barricade after seeing his friends design, Bennie Cooley, of C.R.T.C., INC, barrie, also known as the Cooley Barricade. Kyle states “He had a great barricade design, but I didn’t think it was quite hard enough to shoot through. So, we added more holes that were more restrictive and at some crazy angles.”
The 9 Hole Drill and Set Up
The VTAC is a very versatile tool that can be used with both paper and steel targets. Kyle talks about a mock drill that he likes to run that can encompass each stressor that the barricade brings. In this drill you will place steel at 50-100 yards and engage the steel once or twice from each position, get your hits to move on. If you want to focus on cover and more CQB distance you can place paper at 25yds.
Engaging different distances, especially with different magnification on your optics, can really separate the pack. You will find things out once in those positions that may make it harder to take that shot. The more magnification, the less of an eye box you have, the less wobbly of a position you can build. You also may have to adjust your position dependent on the target you are engaging.
Say you are running just a dot. That may enhance your speed and position building but hinder your accuracy, engagement dependent.
Pushing a person through each 9 holes will allow them to think ahead and call their shots if they want to get faster.
“First and foremost, we want to find the positions that work for you. I want students to experiment with different positions to see what works. You can also change the difficulty of the drill by adding support side shooting on the last low hole or shoot the entire drill from the support side.”– Kyle Lamb
If you are running targets closer in for pistol and low light applciations be sure to place the targets closer to the ground than you normally would due to the difficulty of seeing the targets when in the prone position on the barricade.
Surefire and Kyle go over the proper set up for a night vision drill HERE.
Self Discovery
Note: Self Discovery is a term I learned from the Green Ops instructors. They use it when trying a new thing or playing around with a different way of attacking something. It really makes you remember to not rush through it and to reflect back on if that method worked for you or not.
This barricade allows shooters to be put into positions that they cannot attack as they normally would. “C clamp” grip won’t work in every port. Nor will having your optic and gun in the normal configuration. Oftentimes these ports are angled so that you can pop your gun into the port but the moment you look into your scope you see barricade and not your targets. This causes you to have to move the angle of the gun. Which then causes a chain reaction, adjusting your head, adjusting your body, finding the correct Field of View (FOV). It all becomes new and uncomfortable.
Some ports also cause you to really know how to use your accessories. In some moments a bipod can be deployed and pressed up to the barricade such like a barricade stop. However if you keep that bipod deployed and then move to the lower ports, you are now too high up to see your engagement. Some accessories also won’t fit through the port. (bipods, scopes, etc)
These positions cause the shooter to start focusing on the secondary things that are not so secondary anymore to making an effective shot.
Calling Shots
“As we squeeze the trigger, we watch our sights. If the sights lift from an acceptable area of the target, which means you have a hit, quickly pull the firearm from the hole and get moving to the next position. I cannot emphasis the importance of this enough. Only those that can make this happen will get a good overall time on the drill.” -Kyle Lamb (Viking Tactics)
Speed. This barricade was designed to learn how to be effective and efficient. Efficiency is moving as quickly as possible while still being effective. To move quickly as possible through this barricade is to call your shots. When shooting on steel, and even paper, having the ability to call your shots will allow you to move to the next place on the barricade without waiting for the feedback. By feedback I mean either seeing/hearing the steel being impacted or seeing your shot impact paper. If you can call your shot the moment you press the trigger by watching where those sights were as the shot broke you can now move to the next position quicker. When you have 9 movements to make…that time adds up. You can also take a follow up shot much quicker if you can call your misses.
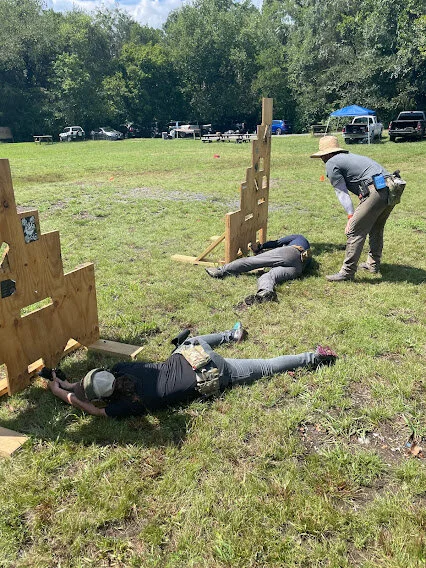
The prone position was much different for pistol shooting for a small port. Shift your body to the side helped to get down low enough to see the sights and placing your strong side leg in front of you helps stabilize.
Efficient Movement
“I push shooters to move the firearm from hole to hole quickly. With a carbine, this translates into pulling it up over your shoulder, then driving the gun to the next target. If you leave the carbine on your shoulder and move your entire body to get to the next hole, it is going to be slower than driving the gun from port to port. This applies directly to movement inside of a vehicle, a confined space or around cover. Ensuring that your safety on the carbine is engaged before moving to the next hole. (Safety first.)”– Kyle Lamb (Viking Tactics)
Hand placement is huge in this aspect as well. Keeping your hands in a place that you know they will need to be for the next shot will keep those adjustments at a minimum when getting onto the target.
“What I like to do on the front of the gun, is to make a simple “C-clamp” effect with my hand. The rear of the carbine will be stabilized by keeping the my back knee up. This may be different than you have previously been instructed, but take the time and try it, you might just like it.” -Kyle Lamb
Legs are are also important to move efficiently on this barricade. Say for some reason you like building your position with a two knee kneel. This can hinder movement and add time and imbalance to move from one position to the next.
Double kneeling limits you quite a bit. Remain flexible.– Jose Gordon (Green Ops)
The VTAC barricade also has 90 degree standard ledges.
Support side knee down and strong side knee up helped me stabilize my gun against the barricade and handle recoil. This can be an issue if using the barricade for concealment however I knew I could put effective shots down range with this position. C Clamping onto both the barricade and my gun helped. USE THE BARRICADE, it’s already there and the most solid thing during the shot.
Effective Shots
One thing that the VTAC barrier has been seen to do is put shooters in a place where they may forget to think about gun placement. So many things are happening when you are mounting a port that you forget about how a gun works. Barrel harmonics are huge on these firearms. How can you hinder these harmonics? By resting the barrel of your gun on the barricade. The VTAC barricade does a fantastic job of making the shot position so awkward that somehow we think we can’t fit our gun into it as we normally would. During class it was seen, a student placed their muzzle device onto the barricade (it was still safe to allow them to take the shot) and he missed the engagement every time. This is due to added tweak to the barrel. Everyone loves their free-float barrels right? Well they aren’t doing anything for you if you’re still loading them incorrectly.
Effective Body Placement
This topic will always be a fight due to everyone using different techniques that may work for them better than others.
In precision rifle I am always trying to think about building the most solid base which means kneeling and allowing my strong arm to be supported by my knee. During standing shots I try to use a wide and locked leg space and bending at the hips.
Kneeling can be done with one leg or two. With gas guns I like to run one strong side knee up (to support a calm trigger press) and support side knee down. Especially if I know I’m going to need to get up fast and move a lot between positions keeping one knee up still allows an effective shot to be taken while also giving me mobility.
With heavy bolt guns I do tend to double kneel sometimes if I cannot rest my strong arm on my propped up knee due to the barricade being too high. The double kneeling does tend to feel more comfortable when the gun is heavier.
The concept of the VTAC barrier design came from a cover and concealment type of application. When you decide that you can take EFFECTIVE shots on this barricade it is then you can start thinking about where your body is as far as concealment on the barricade. (remember, not everything is proper cover even if it is concealment ie. Cars, bullets go through car doors)
What’s the Standard?
With steel at 50 yards, I want everyone to shoot this drill in under 60 seconds. More than likely, a shooter won’t make it on the first attempt. I have seen some students shoot one shot per hole (with good hits) and complete this drill in under 30 seconds. That is a smoking run.– Kyle Lamb (Viking Tactics)
Below is myself running the 9 hole drill for the second time ever at a Green Ops Defensive Pistol II class. Take that as you will as far as a “standard.” Notice the different way that both shooters are using the barricade. One is shooting through the ports off the barricade and I am on and using the barricade.
Note: If using the shoot through the port method, this can be faster if you are putting effective shots down range without the additional support of the barricade. Also remember height over bore..thankfully Kyle designed this barricade using wood so a bullet hole will be “just” a bullet hole.
